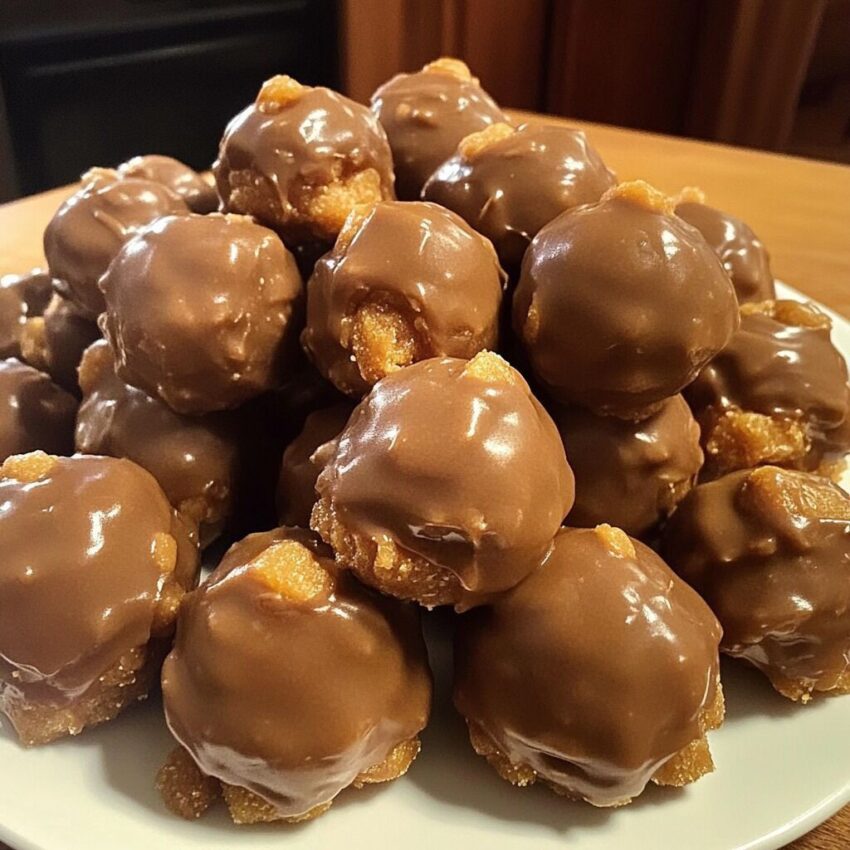
Indulge in rich, no-bake Butterfinger Balls crunchy peanut butter candy combined with sweetened condensed milk, coated in chocolate, perfect for parties, holidays, or anytime you crave a decadent treat.
Butterfinger Balls
Butterfinger Balls are a sweet, no-bake dessert made primarily from crushed Butterfinger candy bars, creamy peanut butter, and sweetened condensed milk, which are then rolled into bite-sized balls and coated in chocolate.
Why You’ll Love This Recipe
-
No-Bake & Quick – Ready in under an hour, perfect for last-minute desserts.
-
Crunchy & Creamy – Butterfinger pieces add texture, chocolate and peanut butter add richness.
-
Party-Ready – Bite-sized and easy to serve for gatherings or holiday celebrations.
-
Customizable – Easily modify chocolate type, peanut butter, or add toppings.
-
Make-Ahead Friendly – Keep in the fridge or freezer until ready to serve.
Ingredients
-
4 cups crushed Butterfinger candy bars (about 10–12 standard bars)
-
1 (14 oz) can sweetened condensed milk
-
1/2 cup creamy peanut butter
-
1 teaspoon vanilla extract
-
2 cups semisweet chocolate chips or chocolate melts
-
1 tablespoon vegetable oil or coconut oil (for smoother chocolate)
-
Optional garnish: crushed Butterfinger, chopped nuts, sprinkles, or drizzle of white chocolate
Step-by-Step Directions
Step 1: Crush the Butterfinger Candy Bars
-
Unwrap Butterfinger bars and place in a large zip-top bag.
-
Using a rolling pin, crush into small pieces, leaving some chunks for texture.
-
Alternatively, use a food processor and pulse a few times to avoid turning it into powder.
Step 2: Make the Peanut Butter Mixture
-
In a large mixing bowl, combine the crushed Butterfinger, sweetened condensed milk, creamy peanut butter, and vanilla extract.
-
Mix thoroughly with a spatula or wooden spoon until the mixture forms a sticky, cohesive dough.
-
Ensure all Butterfinger pieces are evenly coated with the peanut butter mixture.
Step 3: Shape the Balls
-
Scoop about 1 tablespoon of the mixture and roll it between your palms to form a ball.
-
Place balls on a parchment-lined baking sheet to prevent sticking.
-
Chill in the refrigerator for 30–45 minutes until firm enough for coating.
Step 4: Melt the Chocolate
-
In a microwave-safe bowl, combine chocolate chips and vegetable or coconut oil.
-
Microwave in 30-second intervals, stirring between each, until smooth and fully melted.
-
Alternatively, melt the chocolate over a double boiler on the stove, stirring until silky.
Step 5: Coat the Butterfinger Balls
-
Using a fork or dipping tool, dip each chilled ball into the melted chocolate until fully coated.
-
Gently tap off excess chocolate and place the coated balls back onto the parchment-lined sheet.
-
Optionally, sprinkle with additional crushed Butterfinger, nuts, or sprinkles while chocolate is still wet.
Step 6: Chill to Set
-
Place the chocolate-coated Butterfinger Balls in the refrigerator for at least 1 hour until chocolate is firm.
-
Once set, transfer to an airtight container for storage.
Tips for Success
-
Keep Some Candy Chunks – Don’t pulverize Butterfinger bars completely; small chunks provide the signature crunch.
-
Chill Thoroughly – Ensures the balls hold their shape during chocolate coating.
-
Use Oil for Smooth Chocolate – Vegetable or coconut oil creates a glossy, smooth coating.
-
Bite-Sized Perfection – Around 1 tablespoon per ball is ideal for serving and snacking.
-
Storage – Keep in the fridge for up to 2 weeks or freeze for longer storage.
Variations
1. Peanut Butter Chocolate Balls
-
Increase peanut butter to 3/4 cup for a creamier, richer texture.
2. Almond Butterfinger Balls
-
Substitute peanut butter with almond butter or add chopped almonds for a nutty flavor.
3. Dark Chocolate Coating
-
Use dark chocolate instead of semisweet for a slightly bitter, sophisticated flavor.
4. Mini Butterfinger Balls
-
Roll smaller 1-inch balls for party platters or bite-sized desserts.
5. Caramel Drizzle
-
After coating in chocolate, drizzle melted caramel on top for extra indulgence.
6. Holiday Version
-
Decorate with colored sprinkles, edible glitter, or white chocolate drizzle for festive occasions.
Serving Suggestions
-
Serve on a decorative platter for parties, potlucks, or holidays.
-
Pair with coffee, milk, or hot chocolate for a decadent snack.
-
Pack in treat bags or boxes for gifts or party favors.
-
Combine with other bite-sized desserts like truffles, fudge, or cookies for a dessert table spread.
Storage & Shelf Life
-
Refrigerator: Store in an airtight container for up to 2 weeks.
-
Freezer: Freeze for up to 3 months. Thaw in the fridge before serving.
-
Transport Tip: Keep chilled in a cooler for outdoor events or picnics.
Nutrition Information (per Butterfinger Ball, approx.)
-
Calories: 180
-
Fat: 10g
-
Carbs: 20g
-
Protein: 3g
-
Sugar: 18g
(Values may vary depending on chocolate and candy brands used.)
Final Thoughts
Butterfinger Balls are a no-bake, crowd-pleasing dessert perfect for holidays, parties, or casual indulgences. With a crunchy Butterfinger center, creamy peanut butter, and smooth chocolate coating, these bite-sized treats are both easy to make and impossible to resist.
Whether you’re preparing them for holiday gatherings, birthday parties, or just a sweet treat, Butterfinger Balls are guaranteed to impress. Their combination of sweet, salty, crunchy, and creamy textures makes them a favorite for all ages.
These make-ahead-friendly treats are perfect for busy hosts and dessert lovers who want a quick, indulgent, and visually appealing sweet.