Nun’s Puffs (Classic French-Style Cream Puffs)
Nun’s Puffs are one of those magical recipes that feel almost too simple to be true. With just a handful of basic pantry ingredients, you can create light, airy, golden puffs that rise beautifully in the oven and melt in your mouth with every bite. These delicate pastries are crisp on the outside, tender on the inside, and incredibly versatile—perfect for breakfast, dessert, tea time, or special occasions.
Often described as a close cousin to cream puffs or gougères, Nun’s Puffs have a unique charm of their own. They require no yeast, no complicated shaping, and no advanced baking skills. If you can boil water and stir flour, you can master this recipe.
In this detailed guide, you’ll learn everything you need to know about making perfect Nun’s Puffs at home—from their fascinating history to step-by-step directions, common mistakes to avoid, flavor variations, serving suggestions, and storage tips.
What Are Nun’s Puffs?
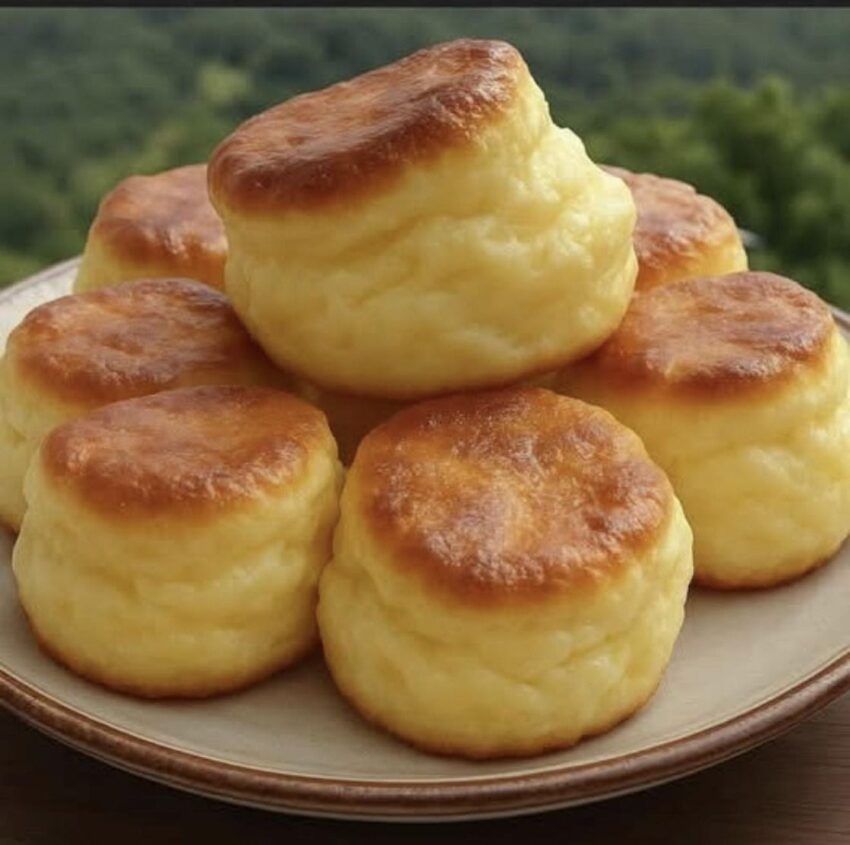
Nun’s Puffs are a classic baked pastry made from a simple choux-style dough. The dough is cooked briefly on the stovetop, then baked at a high temperature to create steam, which causes the puffs to rise dramatically in the oven.
The result is a hollow or semi-hollow pastry with a crisp shell and soft interior. Traditionally, Nun’s Puffs are lightly sweetened and sometimes finished with powdered sugar or honey, though savory versions also exist.
Despite their elegant appearance, Nun’s Puffs are surprisingly rustic and forgiving, making them ideal for home bakers.
A Brief History of Nun’s Puffs
The name “Nun’s Puffs” is believed to come from European convent kitchens, where nuns were known for creating simple yet refined baked goods using minimal ingredients. Flour, eggs, butter, and milk were staples, and these ingredients formed the base of many classic pastries.
Over time, the recipe traveled across regions and generations, evolving slightly but always keeping its core simplicity. Today, Nun’s Puffs are loved for their light texture, ease of preparation, and nostalgic charm.
Why You’ll Love This Recipe
-
Made with basic pantry ingredients
-
No yeast or rising time required
-
Light, airy, and beautifully golden
-
Perfect for sweet or savory fillings
-
Beginner-friendly with impressive results
-
Great for make-ahead baking
Whether you’re new to baking or an experienced cook, Nun’s Puffs are a recipe you’ll return to again and again.
Ingredients for Nun’s Puffs
This recipe uses simple, everyday ingredients. Quality matters, so use fresh eggs and real butter for best results.
Basic Ingredients
-
1 cup whole milk
-
½ cup unsalted butter
-
1 cup all-purpose flour
-
4 large eggs
-
¼ teaspoon salt
-
1 tablespoon granulated sugar (optional, for sweet version)
Equipment You’ll Need
-
Medium saucepan
-
Wooden spoon or silicone spatula
-
Mixing bowl
-
Baking sheet
-
Parchment paper (recommended)
-
Measuring cups and spoons
No mixer is required—everything can be done by hand.
Step-by-Step Directions for Nun’s Puffs
Follow these steps carefully, and you’ll be rewarded with perfectly puffed pastries.
Step 1: Preheat the Oven
Preheat your oven to 425°F (220°C). This high temperature is essential for creating steam, which helps the puffs rise properly.
Line a baking sheet with parchment paper and set aside.
Step 2: Heat the Milk and Butter
In a medium saucepan, combine the milk and butter. Place the pan over medium heat and stir occasionally until the butter is completely melted and the mixture begins to simmer gently.
Do not let it boil aggressively.
Step 3: Add Flour, Salt, and Sugar
Once the milk and butter mixture is hot, reduce the heat to low. Add the flour, salt, and sugar (if using) all at once.
Stir vigorously with a wooden spoon. The mixture will quickly come together into a thick dough and pull away from the sides of the pan.
This step is crucial—it cooks the flour slightly and removes excess moisture.
Step 4: Cook the Dough
Continue stirring the dough over low heat for about 1–2 minutes. A thin film may form on the bottom of the pan, which is normal.
Remove the pan from heat.
Step 5: Cool Slightly
Transfer the dough to a mixing bowl and allow it to cool for 3–5 minutes. This prevents the eggs from scrambling when added.
Step 6: Add Eggs One at a Time
Add the eggs one at a time, mixing well after each addition. At first, the dough may look separated or glossy—keep stirring, and it will come back together into a smooth, thick batter.
The final dough should be soft, shiny, and able to hold its shape when spooned.
Step 7: Portion the Dough
Using a spoon or small scoop, drop rounded portions of dough onto the prepared baking sheet, spacing them about 2 inches apart.
They don’t need to be perfectly shaped—rustic is part of their charm.
Step 8: Bake
Place the baking sheet in the preheated oven and bake for 25–30 minutes, or until the puffs are tall, golden brown, and crisp on the outside.
Do not open the oven door during baking, as this can cause the puffs to collapse.
Step 9: Cool Slightly
Once baked, remove the puffs from the oven and let them cool on a wire rack. They will deflate slightly as they cool—this is normal.
How Nun’s Puffs Rise (The Science Behind Them)
Nun’s Puffs rely entirely on steam, not baking powder or yeast. The high moisture content in the dough turns into steam in the hot oven, forcing the dough to expand and puff up.
This is why:
-
High oven temperature is essential
-
Eggs are crucial for structure
-
The dough must be cooked before baking
Understanding this process helps ensure consistent results every time.
Common Mistakes to Avoid
1. Oven Not Hot Enough
If the oven is too cool, the puffs won’t rise properly.
2. Adding Eggs Too Quickly
Always add eggs one at a time and mix thoroughly.
3. Opening the Oven Door
This releases steam and causes collapse.
4. Undercooking
Puffs should be golden and dry on the outside.
Sweet Variations of Nun’s Puffs
Nun’s Puffs are incredibly versatile. Here are some delicious sweet ideas:
Honey-Drizzled Nun’s Puffs
Warm the puffs slightly and drizzle with honey.
Powdered Sugar Finish
Dust generously with powdered sugar before serving.
Cinnamon Sugar Puffs
Toss warm puffs in cinnamon sugar for a churro-like flavor.
Filled Nun’s Puffs
Slice open and fill with:
-
Whipped cream
-
Vanilla custard
-
Pastry cream
-
Chocolate mousse
Savory Variations
Skip the sugar and try these savory twists:
-
Add grated cheese to the dough
-
Sprinkle with herbs before baking
-
Fill with chicken salad or cream cheese
-
Serve with soups and stews
Savory Nun’s Puffs make excellent appetizers or side dishes.
Serving Suggestions
Nun’s Puffs are best served fresh but can be enjoyed in many ways:
-
With tea or coffee
-
As a light dessert
-
For brunch or breakfast
-
On dessert platters
-
At parties and gatherings
Their light texture makes them perfect after a heavy meal.
How to Store Nun’s Puffs
Short-Term Storage
Store at room temperature in an airtight container for up to 1 day.
Refrigeration
Not recommended, as moisture softens the shells.
Freezing
Freeze baked and cooled puffs for up to 2 months. Reheat in a hot oven to restore crispness.
Reheating Tips
To re-crisp:
-
Place in a 350°F (175°C) oven for 5–7 minutes
-
Avoid microwaving, which makes them soggy
Nutritional Overview (Approximate)
Nun’s Puffs are a light indulgence when enjoyed in moderation. They are lower in sugar than many desserts and contain protein from eggs.
Frequently Asked Questions
Can I make the dough ahead of time?
It’s best baked fresh, but dough can be refrigerated for a few hours.
Why did my puffs collapse?
They may be underbaked or the oven door was opened too early.
Can I use water instead of milk?
Yes, but milk adds better flavor and color.
Final Thoughts
Nun’s Puffs are proof that simple ingredients can create something truly special. With their golden exterior, airy interior, and endless serving possibilities, they are a timeless recipe worth mastering.
Whether you enjoy them sweet or savory, plain or filled, fresh from the oven or gently reheated, Nun’s Puffs deliver comfort, elegance, and satisfaction in every bite.
Once you make them, you’ll understand why this humble pastry has been loved for generations—and why it deserves a place in your kitchen today.
