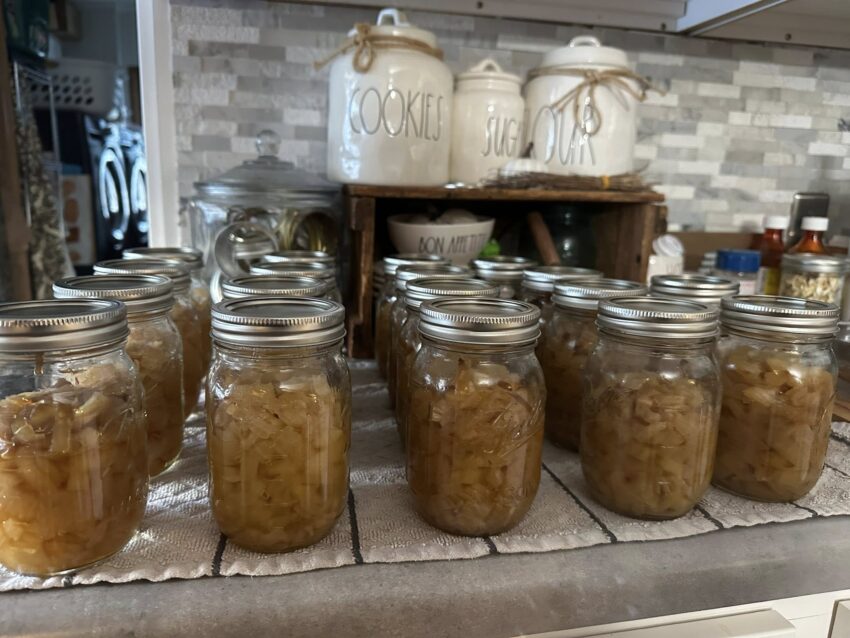
Pressure canning onions is a safe and practical way to preserve onions for long-term storage. Properly canned onions are shelf-stable for up to one year and can be used in soups, stews, gravies, casseroles, curries, and everyday cooking. Because onions are a low-acid vegetable, they must be pressure canned to prevent food-borne illness.
Important Safety Note
Never water-bath can onions. Always use a pressure canner, not a pressure cooker.
Ingredients
-
Fresh onions (any variety: white, yellow, or red)
-
Clean water (for boiling and filling jars)
-
Salt (optional – for flavor only; does not affect safety)
Equipment Needed
-
Pressure canner (dial-gauge or weighted-gauge)
-
Mason jars (pint or quart)
-
New jar lids and bands
-
Jar lifter
-
Large pot
-
Sharp knife
-
Cutting board
-
Clean towels
Step 1: Prepare the Onions
-
Choose fresh, firm onions without soft spots or mold.
-
Wash onions thoroughly under running water.
-
Peel off outer skins and trim the root and stem ends.
-
Cut onions as desired:
-
Diced (most common)
-
Sliced
-
Small whole onions (1–1¼ inches)
-
👉 Uniform size helps even heating during canning.
Step 2: Pre-Cook the Onions (Hot Pack Method)
-
Place chopped onions into a large pot.
-
Add enough water to cover the onions.
-
Bring to a boil, then reduce heat.
-
Simmer for 5 minutes, stirring occasionally.
🔹 Pre-cooking removes air from the onions and improves jar quality.
Step 3: Prepare Jars and Canner
-
Wash jars, lids, and bands in hot soapy water.
-
Keep jars hot until filling (do not boil lids).
-
Add 2–3 inches of water to the pressure canner.
-
Place the canner on the stove and heat on low.
Step 4: Fill the Jars
-
Using a slotted spoon, pack hot onions into jars.
-
Leave 1 inch headspace at the top.
-
Add cooking liquid or boiling water to cover onions.
-
Optional: Add ½ teaspoon salt per pint or 1 teaspoon per quart.
-
Remove air bubbles using a non-metal tool.
-
Wipe jar rims clean.
-
Place lids on jars and screw bands finger-tight.
Step 5: Load and Vent the Pressure Canner
-
Place jars onto the canner rack.
-
Lock the lid securely.
-
Turn heat to medium-high.
-
Allow steam to vent for 10 minutes.
-
Apply weight or close vent according to canner instructions.
Step 6: Pressure Canning Time & Pressure
Process both pint and quart jars for 40 minutes.
Pressure Settings:
-
Dial-Gauge Canner
-
11 lbs pressure (0–2,000 ft altitude)
-
Increase pressure if at higher altitude
-
-
Weighted-Gauge Canner
-
10 lbs pressure (0–1,000 ft)
-
15 lbs pressure for higher elevations
-
⚠️ Maintain steady pressure for the full time. If pressure drops, restart timing.
Step 7: Cooling and Removing Jars
-
Turn off heat after processing.
-
Let canner cool naturally until pressure reaches zero.
-
Wait 10 more minutes before opening the lid.
-
Carefully remove jars using a jar lifter.
-
Place jars on a towel, undisturbed, for 12–24 hours.
Step 8: Check Seals and Store
-
Press the center of each lid:
-
No movement = sealed
-
-
Remove bands.
-
Label jars with date and contents.
-
Store in a cool, dark, dry place.
⏳ Shelf life: Up to 12 months
How to Use Pressure Canned Onions
-
Add directly to soups, stews, and curries
-
Use for gravies and sauces
-
Fry lightly for quick meals
-
Perfect for emergency food storage
Final Tips
-
Do not add vinegar or oil before canning.
-
Never thicken onions before canning.
-
Always follow tested pressure-canning guidelines.
Pressure canned onions save time, reduce waste, and give you ready-to-use onions all year long. With proper technique, they are safe, flavorful, and incredibly convenient for everyday cooking.