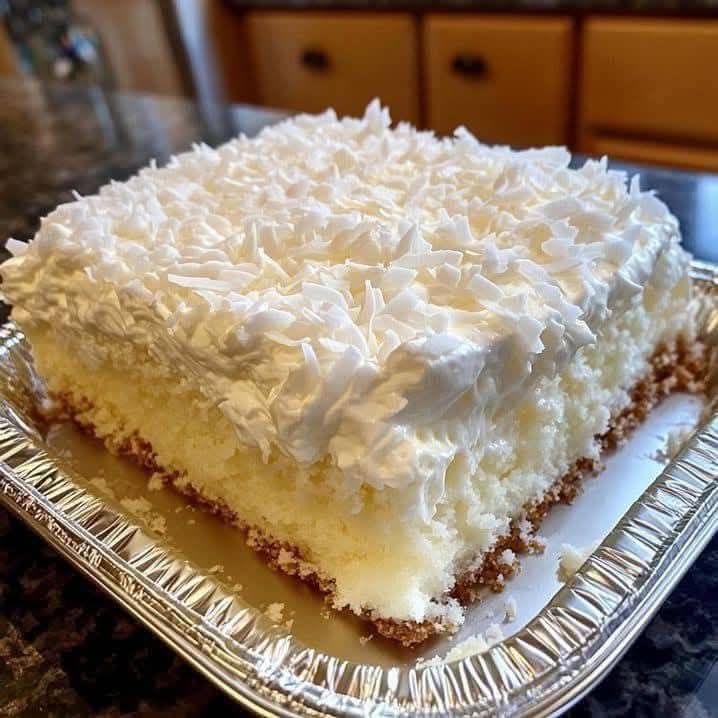
Experience a taste of paradise with this Coconut Cream Dream Cake a soft, moist coconut-infused cake layered with creamy coconut filling and fluffy whipped topping. Perfect for birthdays, holidays, and any occasion that calls for a sweet tropical escape.
Coconut Cream Dream Cake
If you love coconut, this Coconut Cream Dream Cake will be your new obsession. It’s the kind of dessert that melts in your mouth and leaves you dreaming of white sandy beaches and gentle ocean breezes.
Each layer is bursting with rich coconut flavor — from the moist coconut cake to the velvety coconut cream filling and the airy whipped topping sprinkled with toasted coconut flakes. It’s light yet indulgent, simple to make yet impressive enough for guests.
Whether served at Easter, a family gathering, or simply as a weekend treat, this cake delivers pure tropical bliss in every bite.
Let’s dive into how to make this dreamy coconut masterpiece step-by-step!
Table of Contents
-
Ingredients
-
Tools You’ll Need
-
Step-by-Step Directions
-
Making the Coconut Cream Filling
-
Assembling the Cake
-
Decorating Tips
-
Storage Instructions
-
Tips for Success
-
Variations
-
Nutritional Information
-
Final Thoughts
Ingredients
For the Cake:
-
2 ½ cups all-purpose flour
-
2 ½ teaspoons baking powder
-
½ teaspoon salt
-
1 cup unsalted butter (softened)
-
1 ¾ cups granulated sugar
-
4 large eggs
-
1 teaspoon coconut extract
-
1 teaspoon vanilla extract
-
1 cup coconut milk (unsweetened or full-fat)
-
½ cup shredded sweetened coconut
For the Coconut Cream Filling:
-
1 can (13.5 oz) coconut milk
-
½ cup granulated sugar
-
3 tablespoons cornstarch
-
1 teaspoon vanilla extract
-
1 cup shredded sweetened coconut
For the Whipped Topping:
-
2 cups heavy whipping cream
-
¼ cup powdered sugar
-
½ teaspoon coconut extract
For Garnish:
-
1 cup toasted coconut flakes
-
Optional: white chocolate curls or a drizzle of condensed milk
Tools You’ll Need
-
Electric mixer or hand whisk
-
Two 9-inch round cake pans
-
Mixing bowls
-
Saucepan
-
Rubber spatula
-
Cooling rack
-
Offset spatula for frosting
Step-by-Step Directions
Step 1: Prepare the Cake Batter
-
Preheat oven to 350°F (175°C). Grease and flour two 9-inch round cake pans, or line with parchment paper.
-
In a medium bowl, whisk together flour, baking powder, and salt. Set aside.
-
In a large bowl, beat butter and sugar together until light and fluffy (about 3 minutes).
-
Add eggs one at a time, beating well after each addition.
-
Stir in vanilla and coconut extract.
-
Alternate adding flour mixture and coconut milk, beginning and ending with flour.
-
Fold in the shredded coconut just until evenly combined.
Step 2: Bake the Cakes
-
Divide the batter evenly between the prepared pans and smooth the tops.
-
Bake for 25–30 minutes, or until a toothpick inserted in the center comes out clean.
-
Cool the cakes in the pans for 10 minutes, then transfer to wire racks to cool completely.
Pro Tip: For perfectly even layers, weigh the batter before pouring it into the pans.
Making the Coconut Cream Filling
Step 3: Cook the Filling
-
In a saucepan, whisk together coconut milk, sugar, and cornstarch until smooth.
-
Cook over medium heat, stirring constantly, until the mixture thickens and begins to bubble (about 5–7 minutes).
-
Remove from heat and stir in vanilla extract and shredded coconut.
-
Let cool completely before layering the cake.
Note: The filling will thicken as it cools, giving a creamy, pudding-like texture that holds the layers together perfectly.
Assembling the Cake
Step 4: Layer the Cake
-
Place one cake layer on a serving plate or cake stand.
-
Spread a generous layer of coconut cream filling evenly across the surface.
-
Add the second cake layer on top and press gently to secure.
Step 5: Add the Whipped Topping
-
In a chilled mixing bowl, whip heavy cream, powdered sugar, and coconut extract together until stiff peaks form.
-
Frost the top and sides of the cake with the whipped cream mixture using an offset spatula.
-
Smooth the edges for a clean look or create soft swirls for a rustic finish.
Step 6: Decorate
-
Sprinkle toasted coconut flakes over the top and sides of the cake for crunch and visual appeal.
-
Optionally, garnish with white chocolate curls or a light drizzle of sweetened condensed milk for extra decadence.
Tips for Perfect Coconut Cream Dream Cake
-
Use room temperature ingredients: This ensures smooth batter and even baking.
-
Don’t overmix: Once the flour is added, mix only until combined to keep the cake tender.
-
Toast your coconut: It adds a richer flavor and beautiful golden color.
-
Chill before serving: Refrigerate for at least 1 hour before slicing for clean layers.
-
Make ahead: You can bake the cake layers a day in advance and refrigerate them wrapped tightly in plastic wrap.
Variations
Pineapple Coconut Dream Cake
Add a layer of crushed pineapple between the cake layers for a tropical twist.
Chocolate Coconut Dream Cake
Mix ¼ cup cocoa powder into the batter for a coconut-chocolate delight.
Lemon Coconut Cake
Add 2 teaspoons of lemon zest to the batter and a splash of lemon juice to the filling for a refreshing citrus note.
Coconut Cream Sheet Cake
Pour the batter into a 9×13-inch pan and bake for 35–40 minutes — perfect for potlucks or parties.
Serving Suggestions
This Coconut Cream Dream Cake pairs wonderfully with:
-
A cup of hot tea or coffee
-
A side of fresh tropical fruit like pineapple or mango
-
A drizzle of caramel or chocolate sauce for an indulgent twist
For special occasions, decorate with edible flowers or coconut truffles for an elegant touch.
Storage Instructions
-
Refrigerator: Store the cake covered in the fridge for up to 4 days.
-
Freezer: Freeze unfrosted cake layers for up to 2 months. Thaw overnight before assembling.
-
Leftovers: Keep slices covered or in airtight containers to maintain freshness.
Tip: The flavor deepens overnight, making this cake even more delicious the next day.
Nutritional Information (Per Slice)
| Nutrient | Amount (Approx.) |
|---|---|
| Calories | 420 kcal |
| Protein | 5 g |
| Carbohydrates | 46 g |
| Fat | 24 g |
| Saturated Fat | 17 g |
| Cholesterol | 95 mg |
| Sodium | 180 mg |
| Fiber | 2 g |
| Sugars | 32 g |
Note: Nutritional values are estimates and may vary depending on specific ingredients used.
Final Thoughts
The Coconut Cream Dream Cake lives up to its name — light, luscious, and layered with creamy coconut perfection. Every bite offers a balance of sweetness, texture, and tropical flavor that feels like sunshine on a plate.
This recipe is proof that you don’t need complicated techniques or expensive ingredients to make a bakery-worthy dessert. The simple combination of coconut milk, shredded coconut, and whipped cream creates a cake that’s soft, flavorful, and unforgettable.
Whether you’re celebrating a birthday, holiday, or just want to treat yourself to something special, this Coconut Cream Dream Cake is sure to impress your guests and satisfy every sweet craving.
So go ahead bake it, slice it, and let every forkful take you on a mini tropical vacation.